
Story Starter for a VACATION
If you're like me you probably have a few pictures you've taken on past trips or vacation destinations that you would like to get off your phone and into something a bit more tangible. Perhaps you want to compile some of those memory-laden photos for someone you traveled with? Whether for you or someone else, I've got just the solution ... Story Starter.
In February, my husband and my daughter and I spent a week on the Hawaiian island of Kauai. We had a FANTASTIC time and I wanted to get some of our best photos scrapbooked before the madness (called summer) descended upon me. I bet you are dying to know how I managed to get 51 photos into a cute, little snack-sized scrapbook in one afternoon. Read on ... I'm going to walk you through my whole workflow/process step by step!
1. Review photos on your phone or other device. Familiarize yourself with the images you captured and do a quick delete of the not-so-good or not-needed duplicates. Technically you can skip this step, but it doesn't take long if you're focused and it frees up space. It also feels SO MUCH BETTER the next time you start scrolling!
2. Scroll through one more time and mark as FAVORITES the photos that are standing out to you—those that you're pretty sure you'd like to print. On an iPhone you'll be able to see little white hearts on the thumbnail photos when you're finished with this step.
3. Now, select these FAVORITES (the ones with the white hearts) and add them to an album. This way you have an easy-to-access collection of your best photos from this trip (now and forever!)
4. Use a collage-making app to create 4x6 photos with 4 different images on each photo . There are many app options for you to choose from, I use the Project Life app.
Here are a few screen shots to show you where to go in the Project Life app. I use the 4x6L collage and bring in only 4 photos. When you export this to your camera roll, you will have a 4x4 image that you can easily print at home (on 4x6 photo paper) or upload to a local developer.

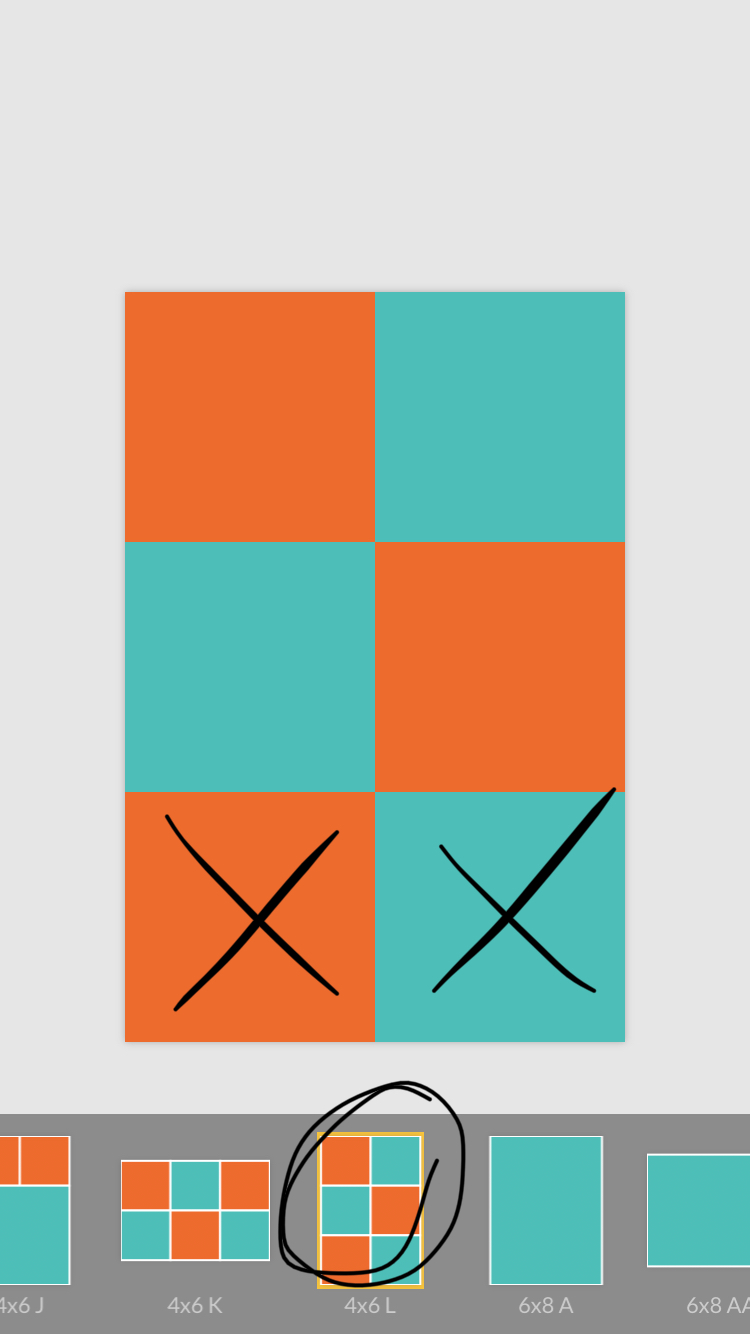
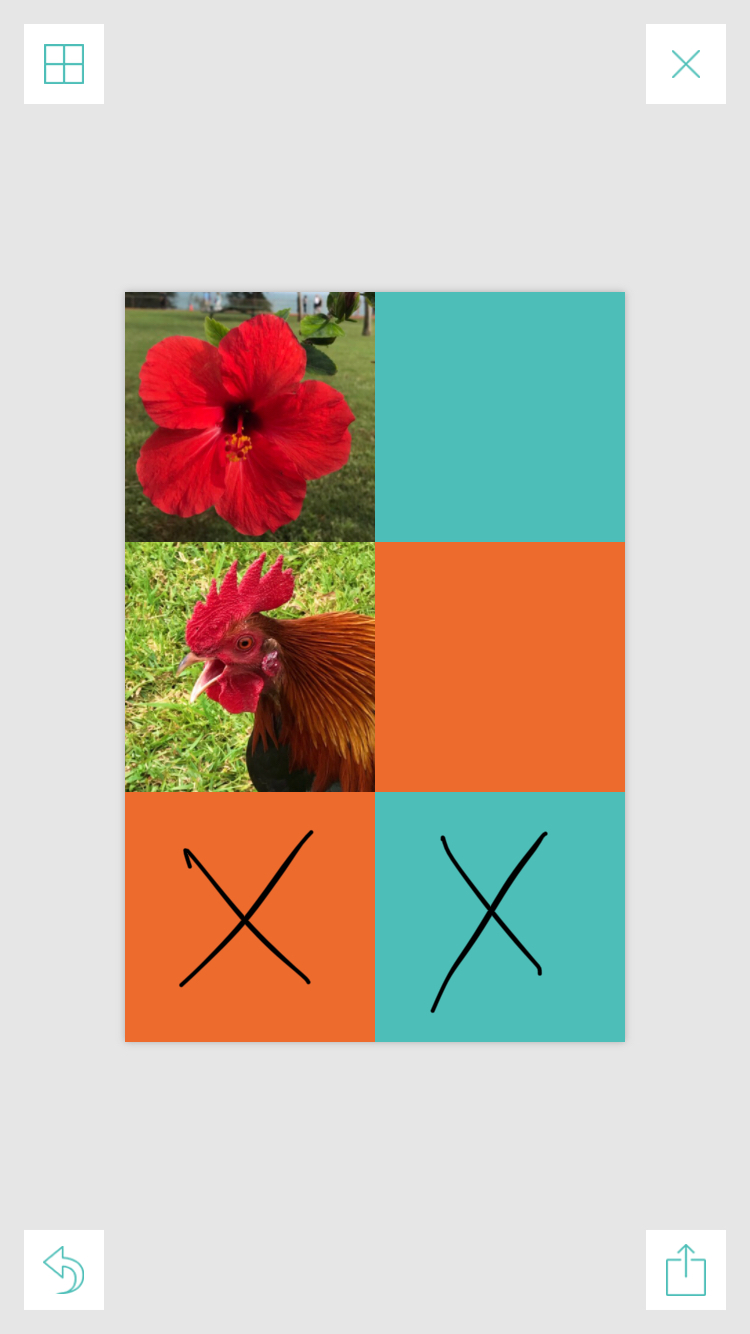
5. Print these 4x4 collage images as 4x6 prints and then trim off the excess white space. Note: for a full 4x4 image, use template 4x6 G in the Project Life app.
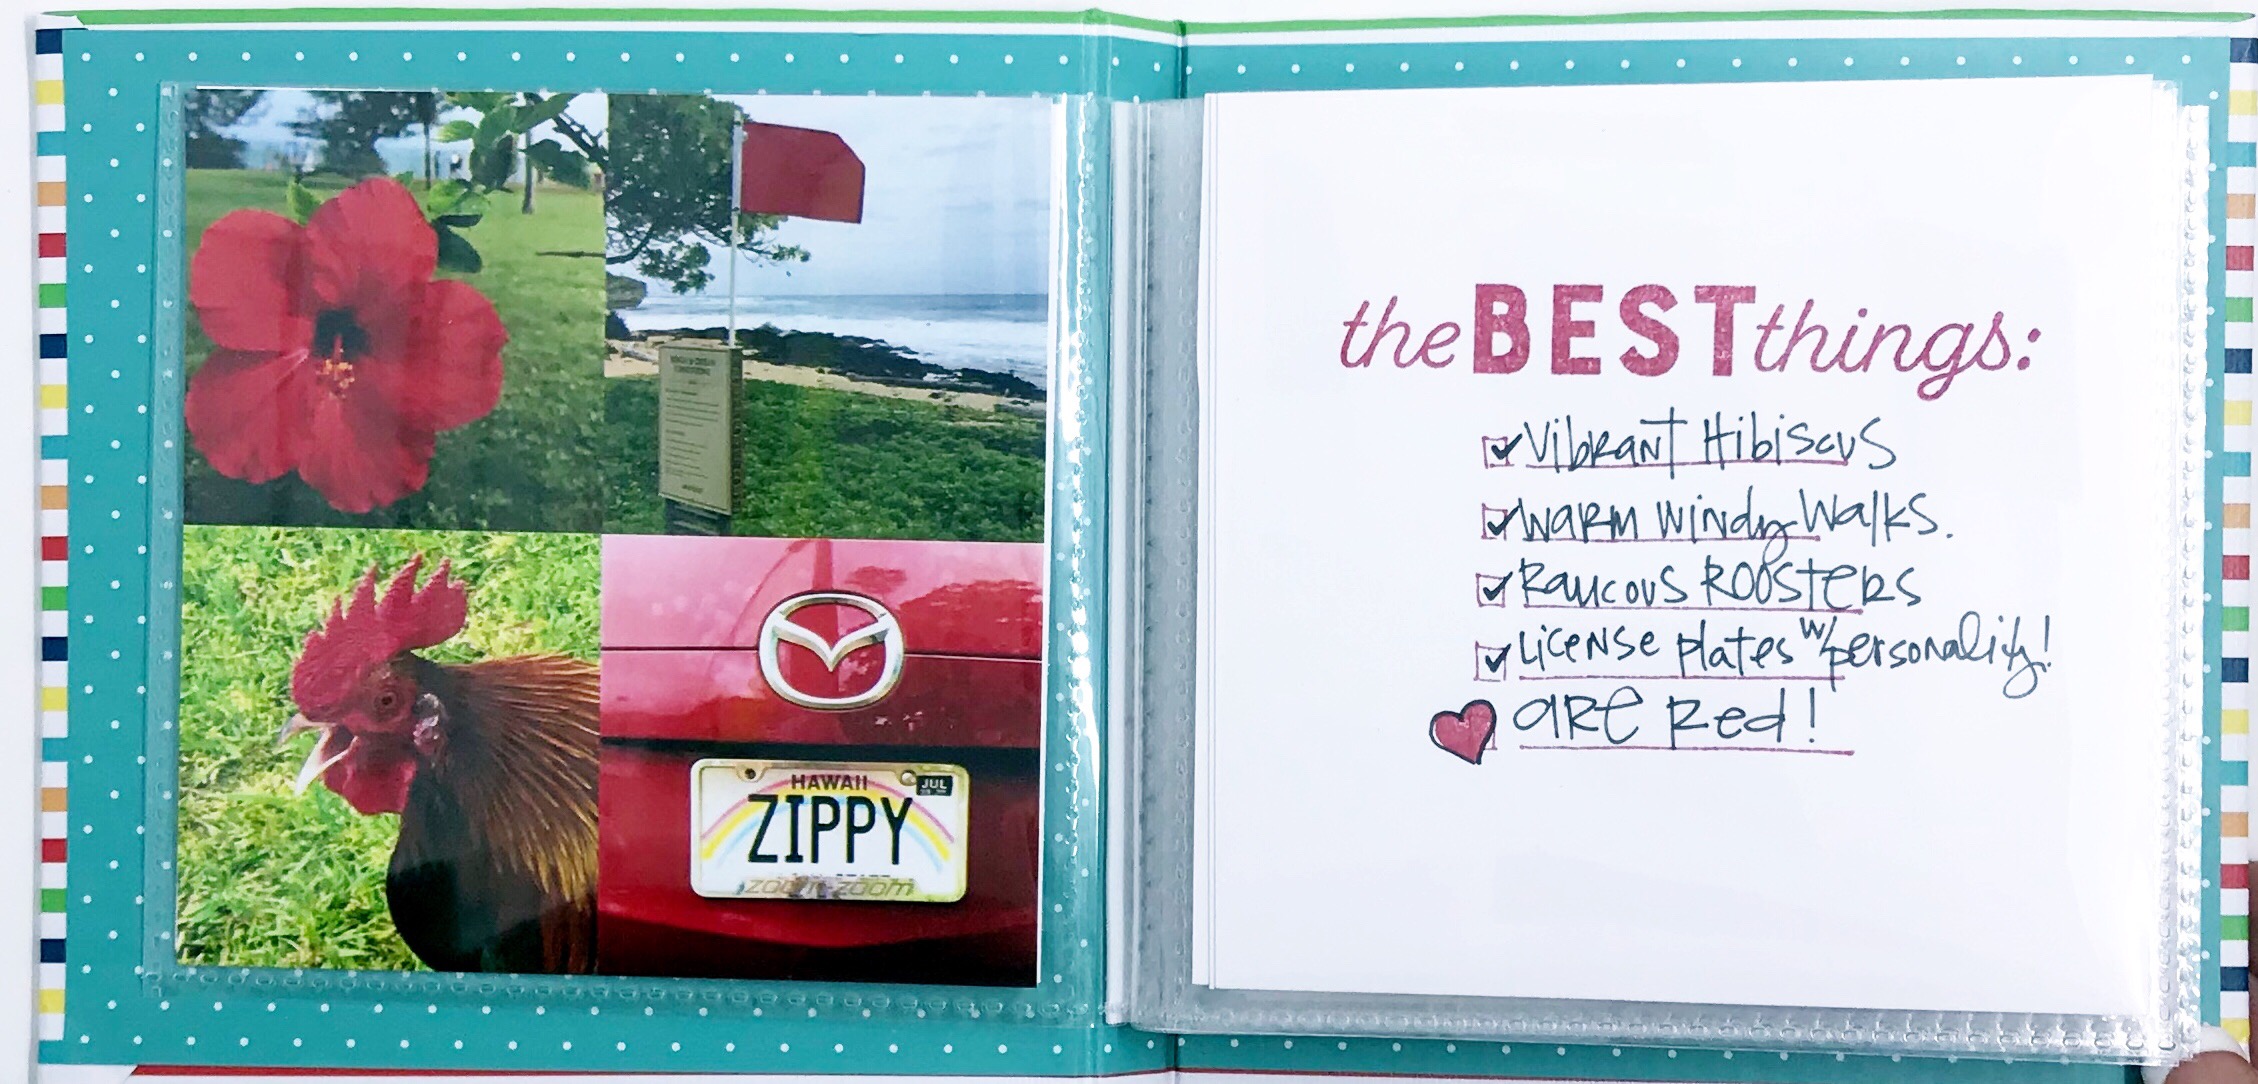
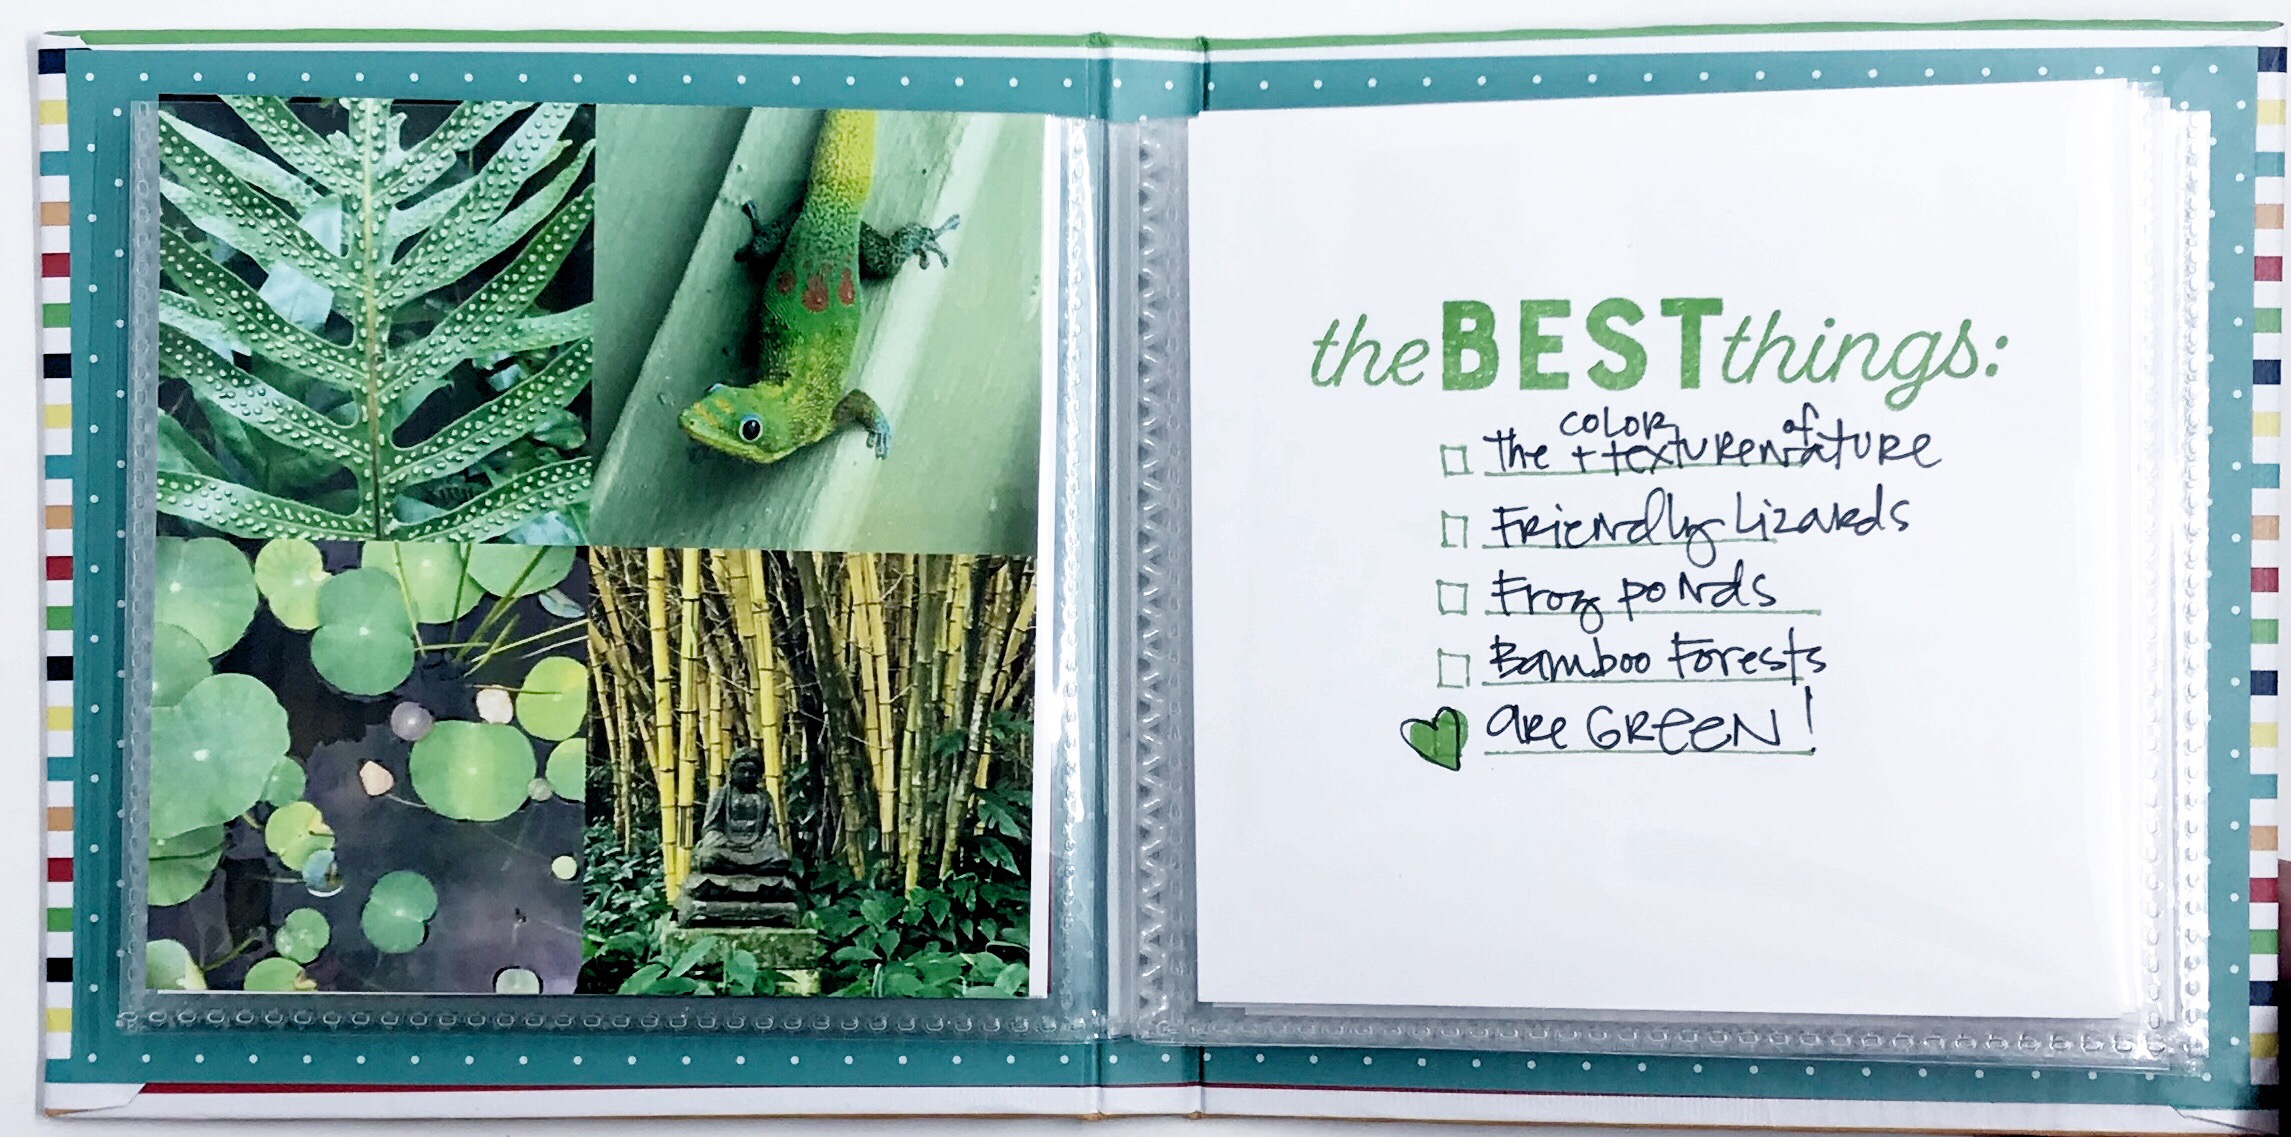
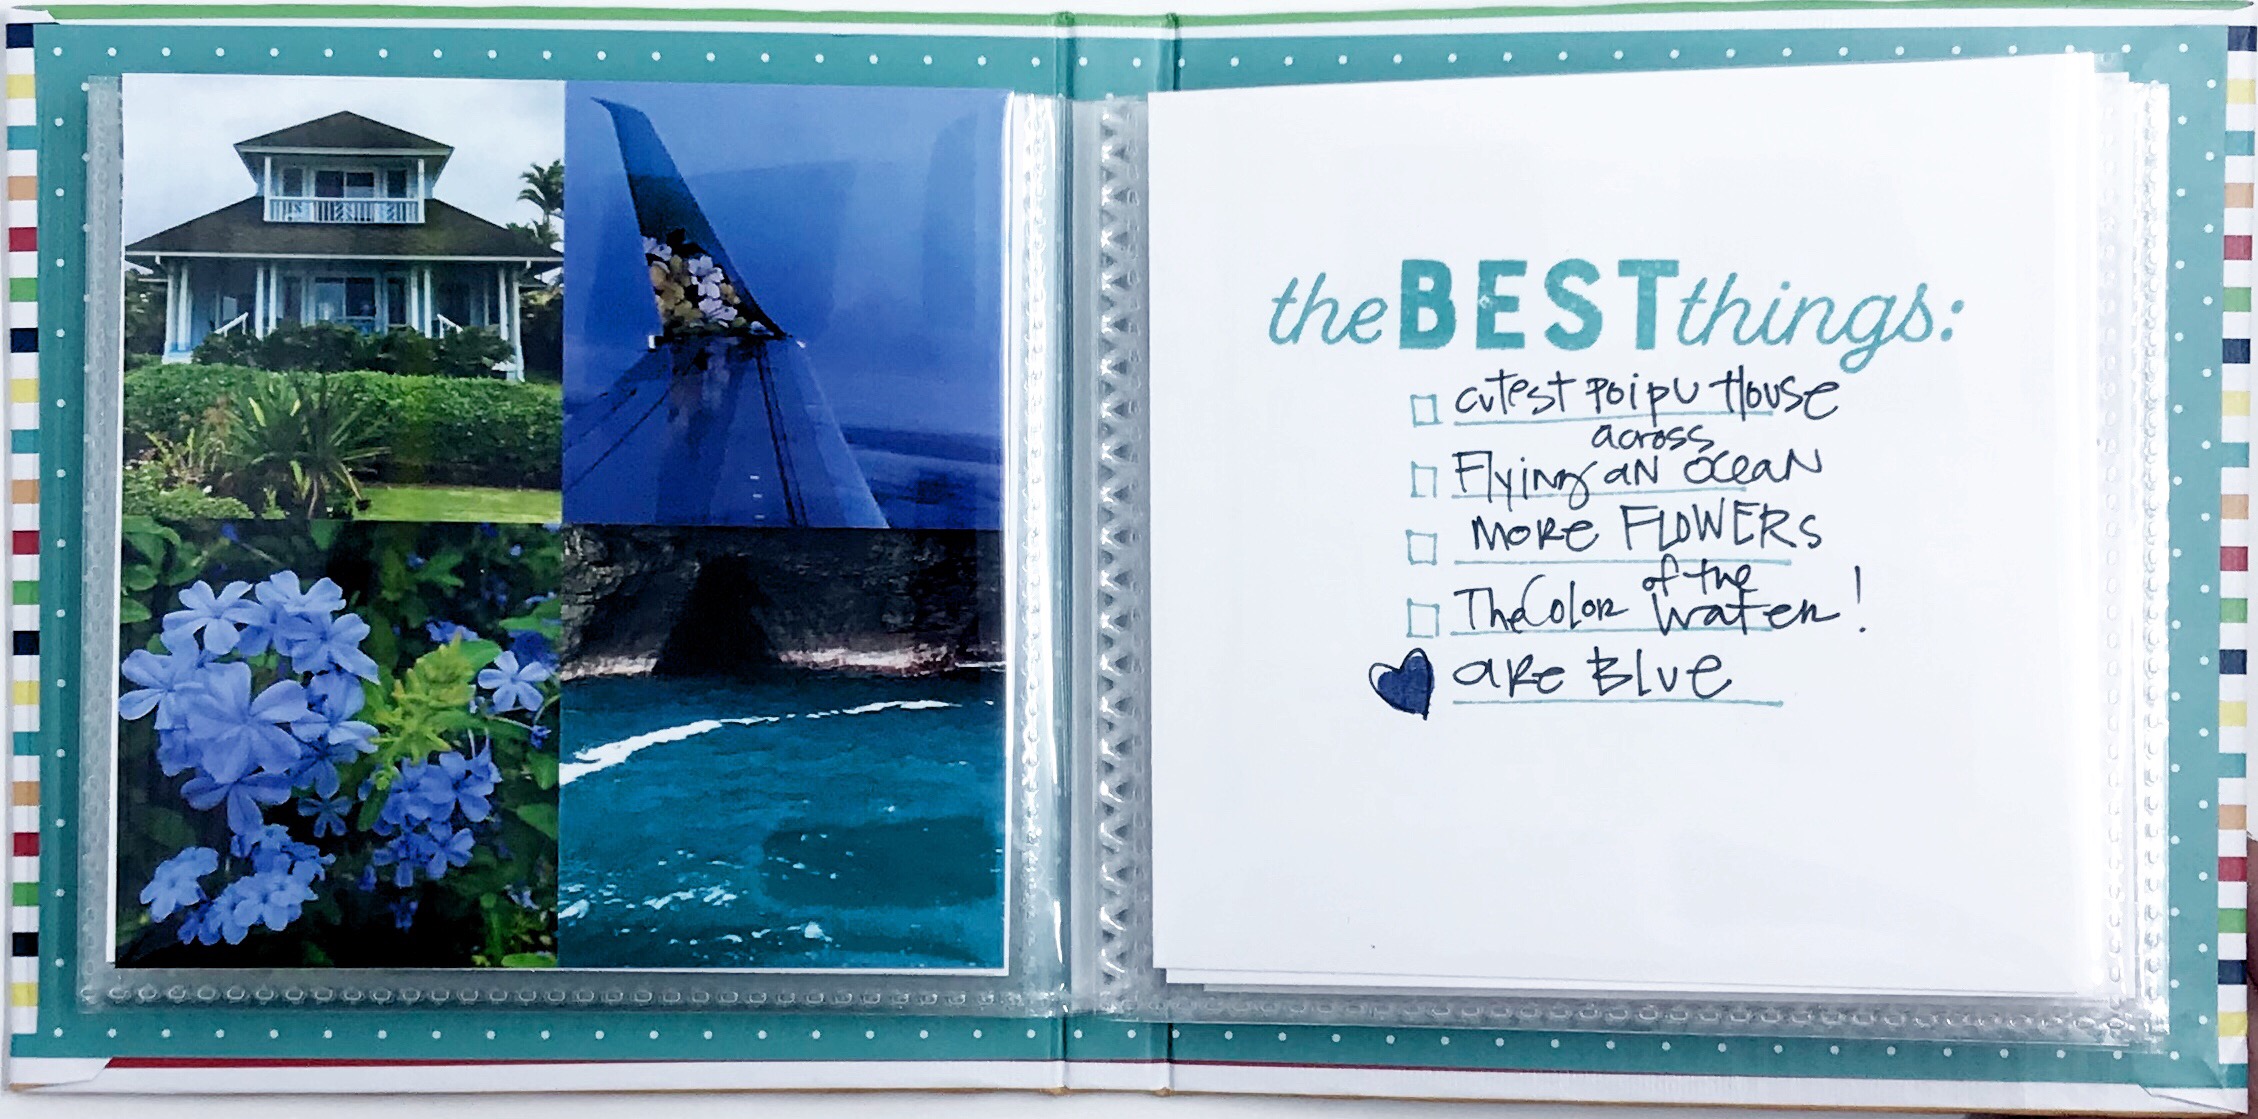
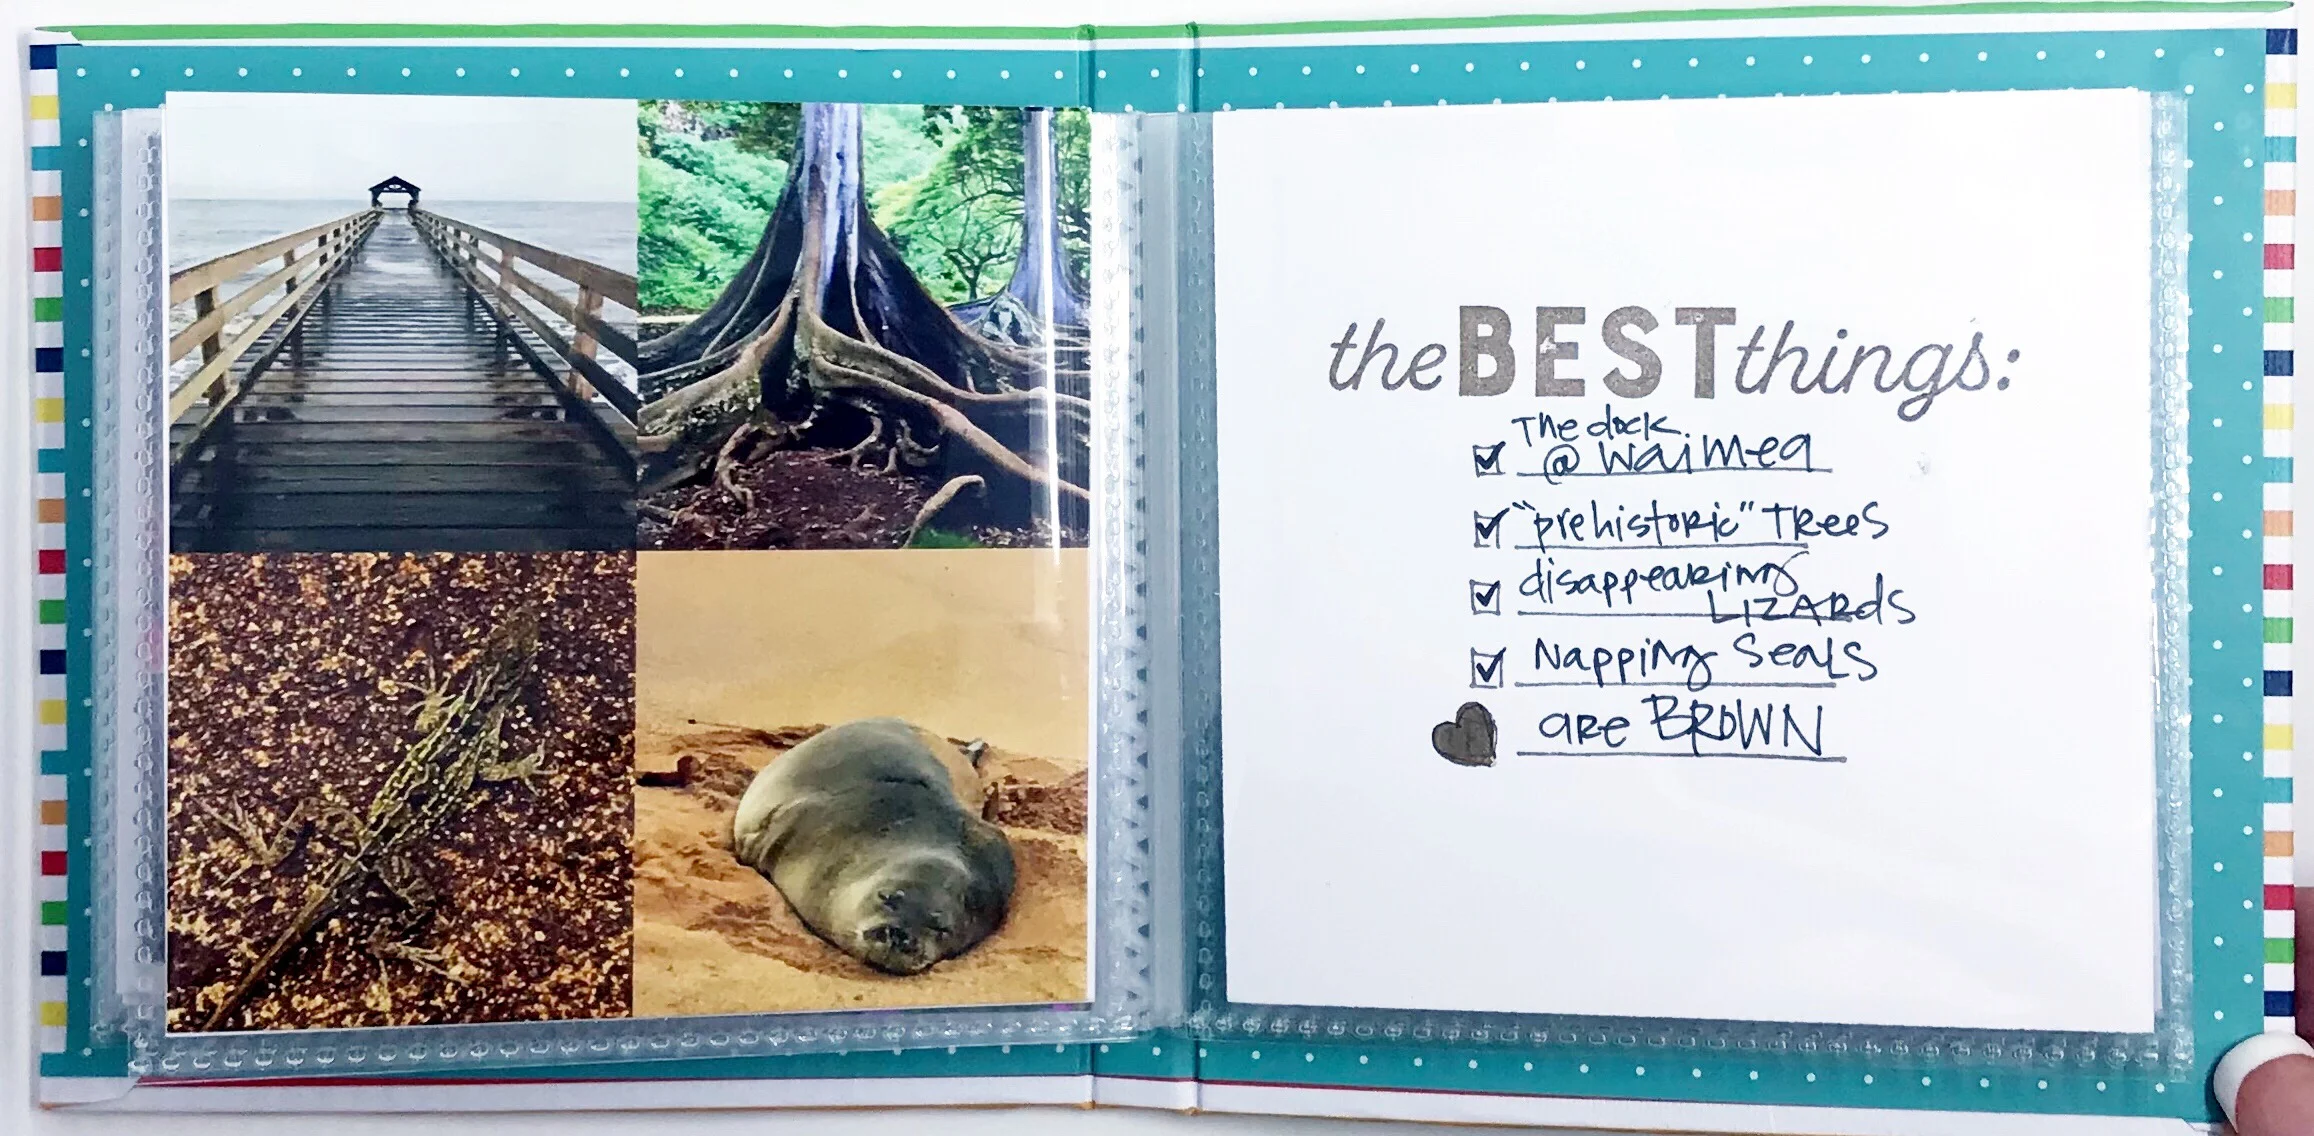
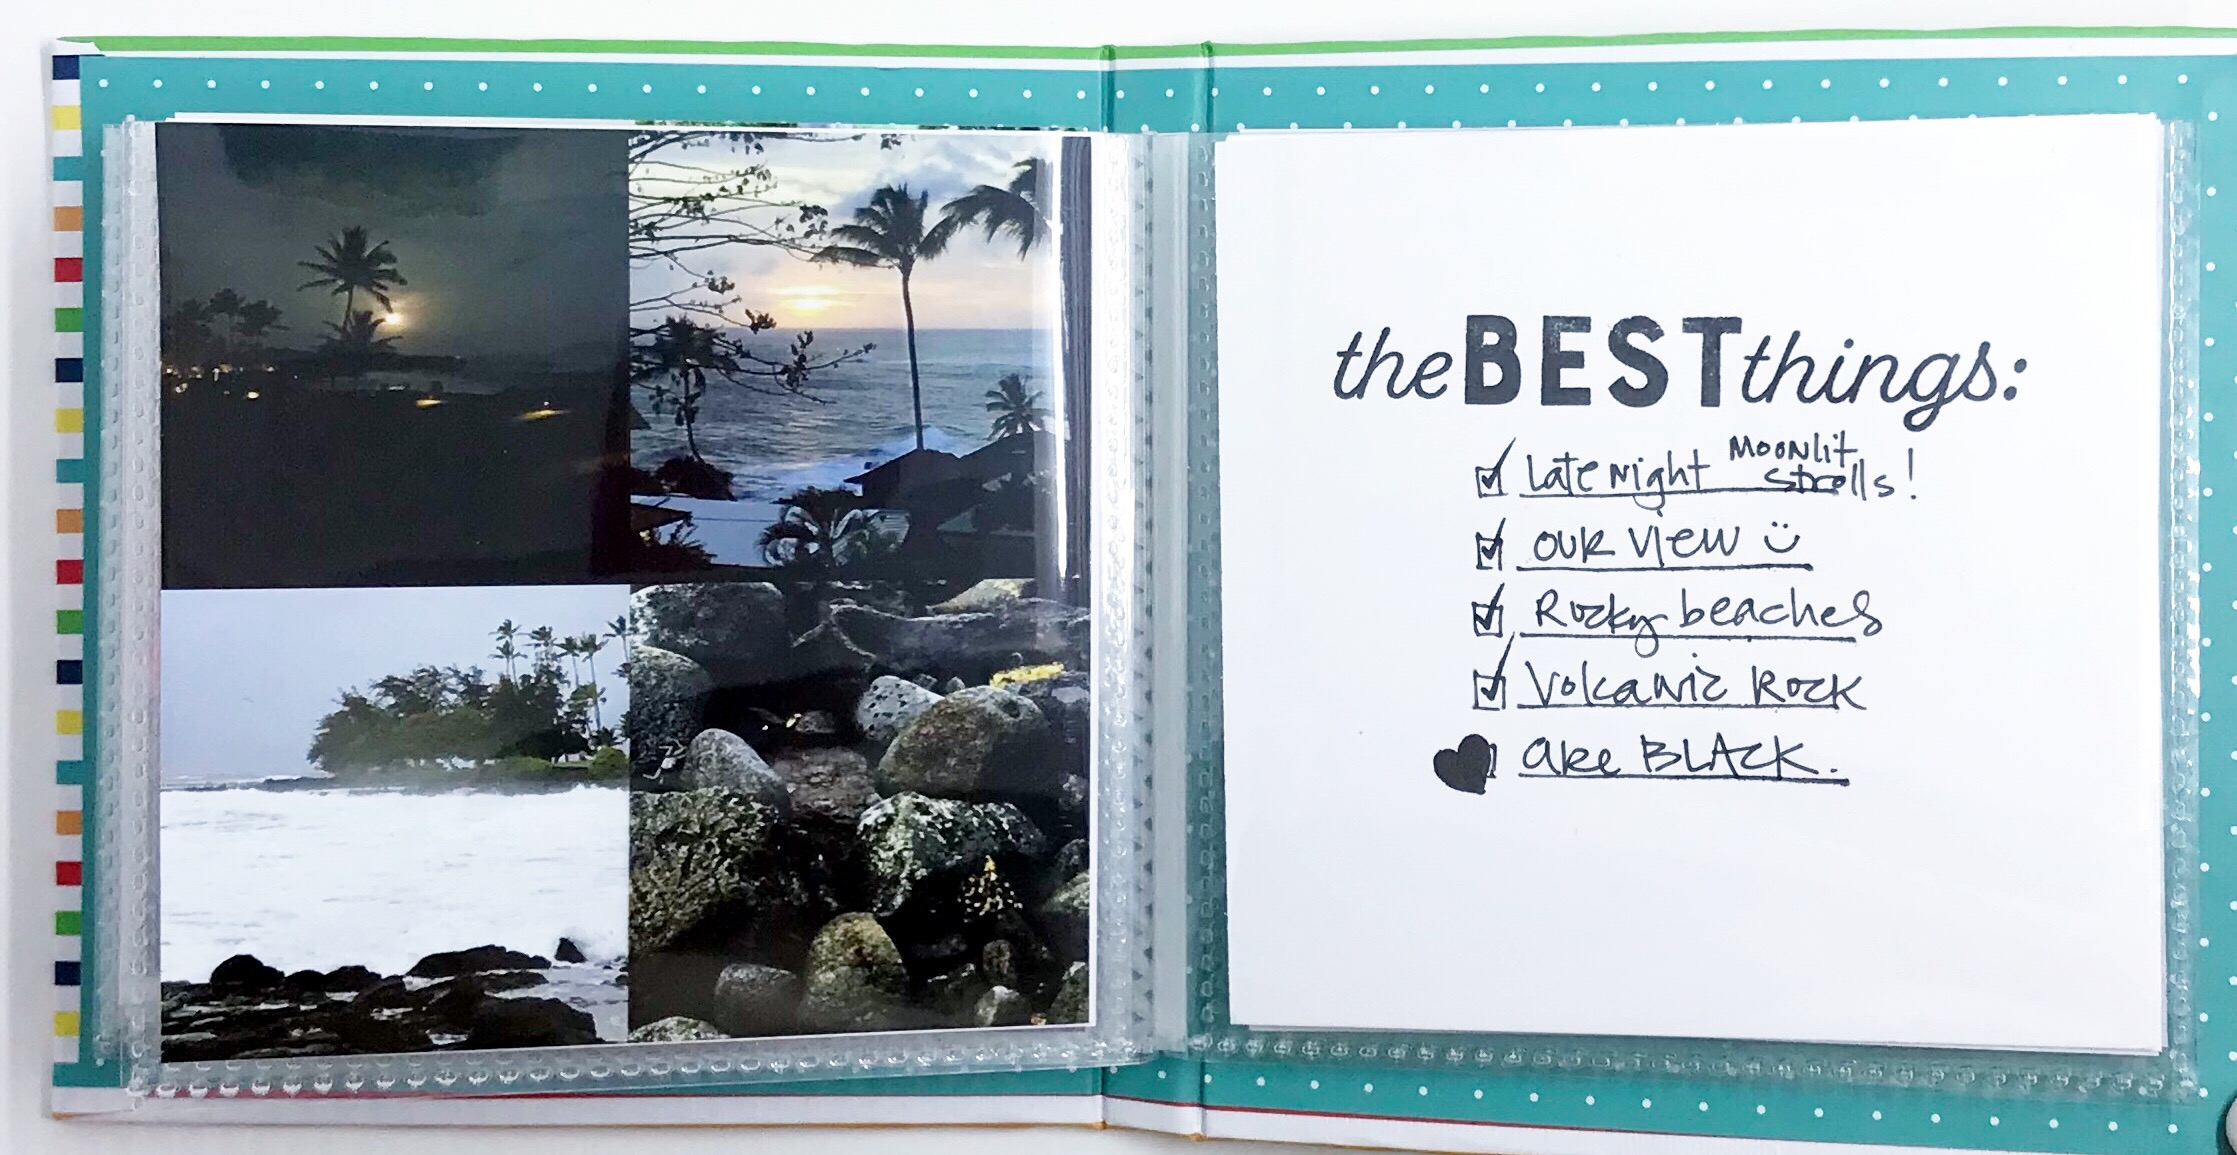
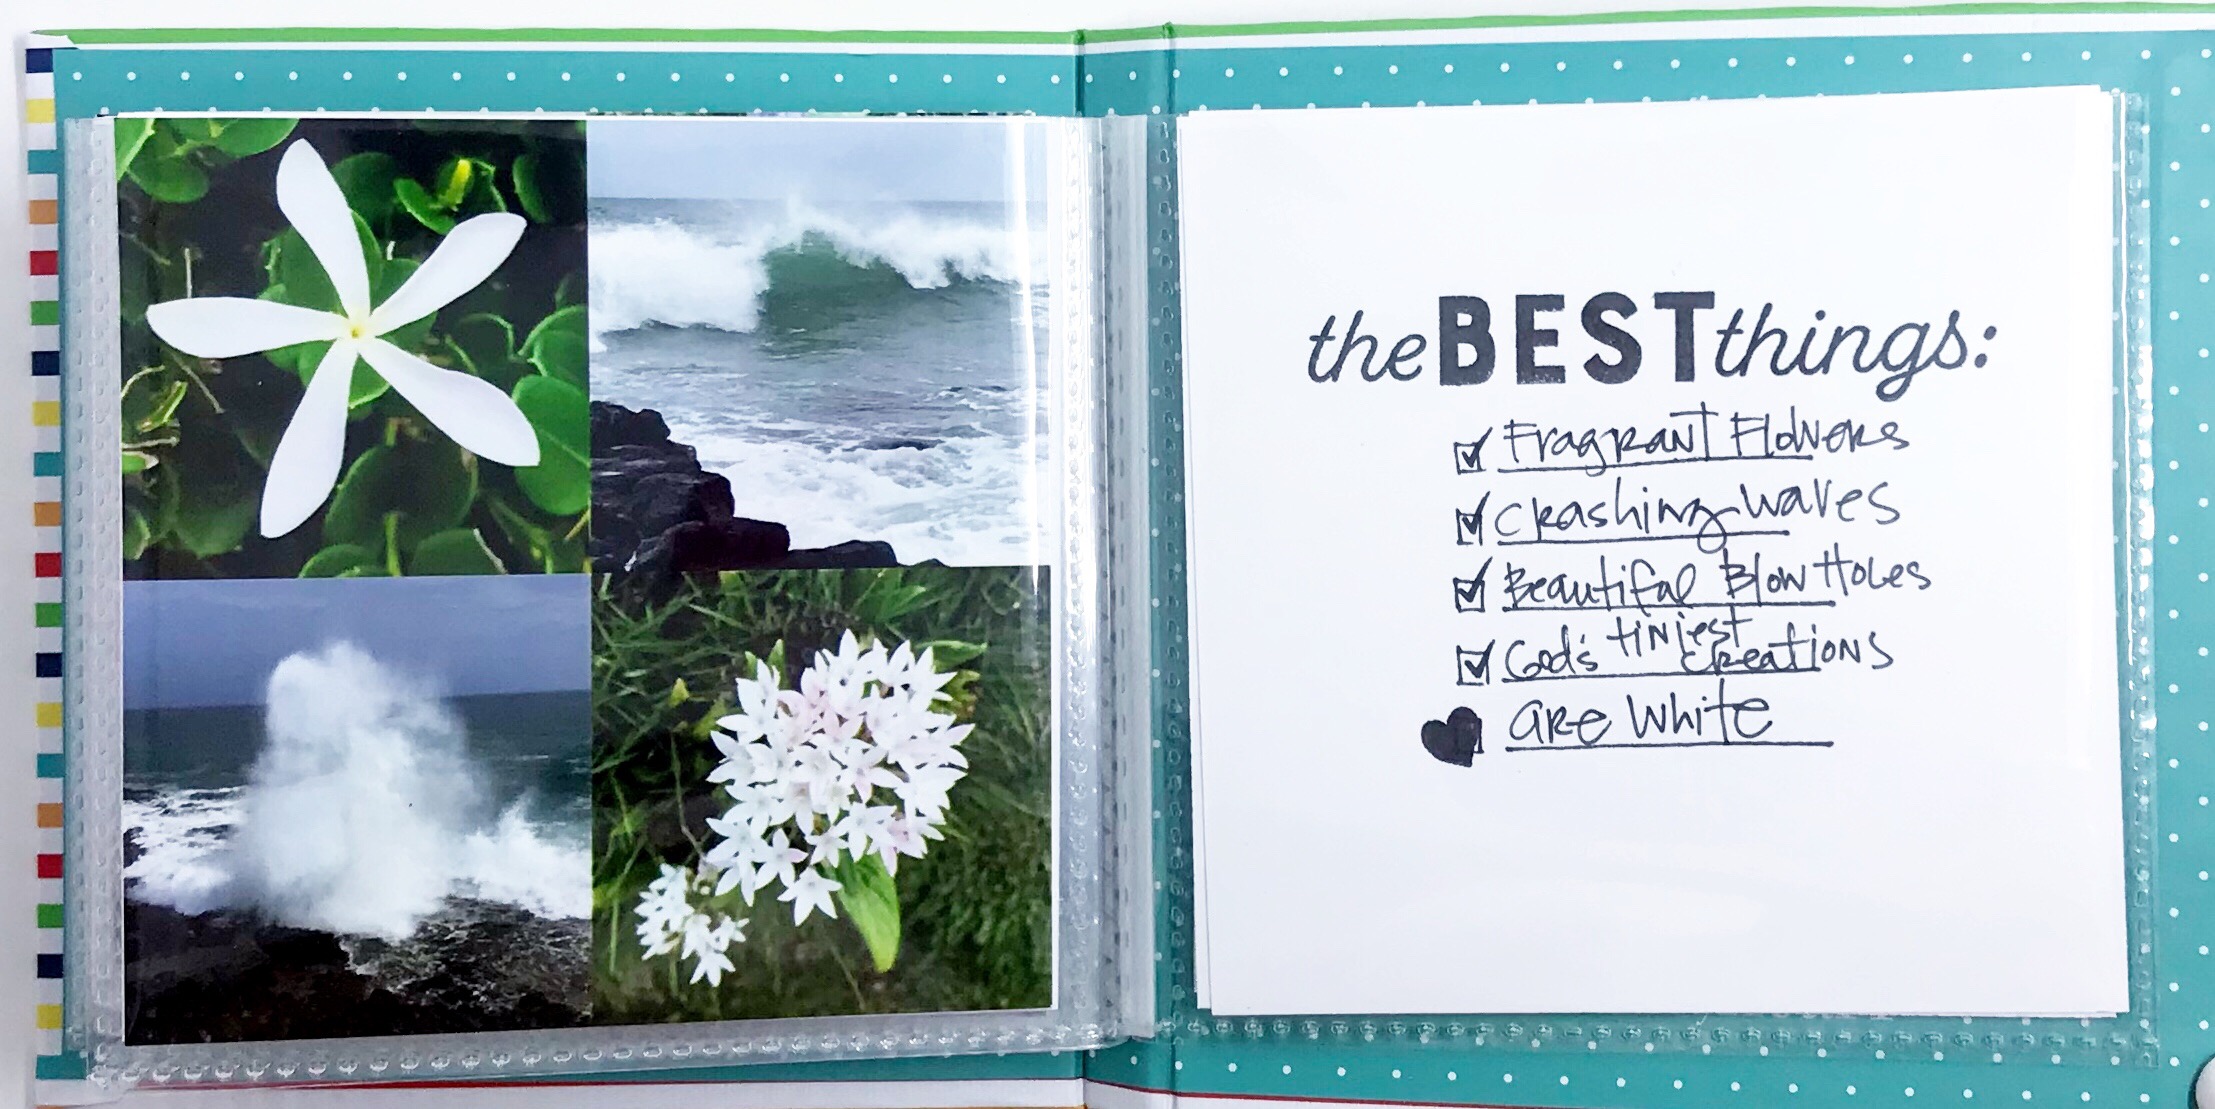
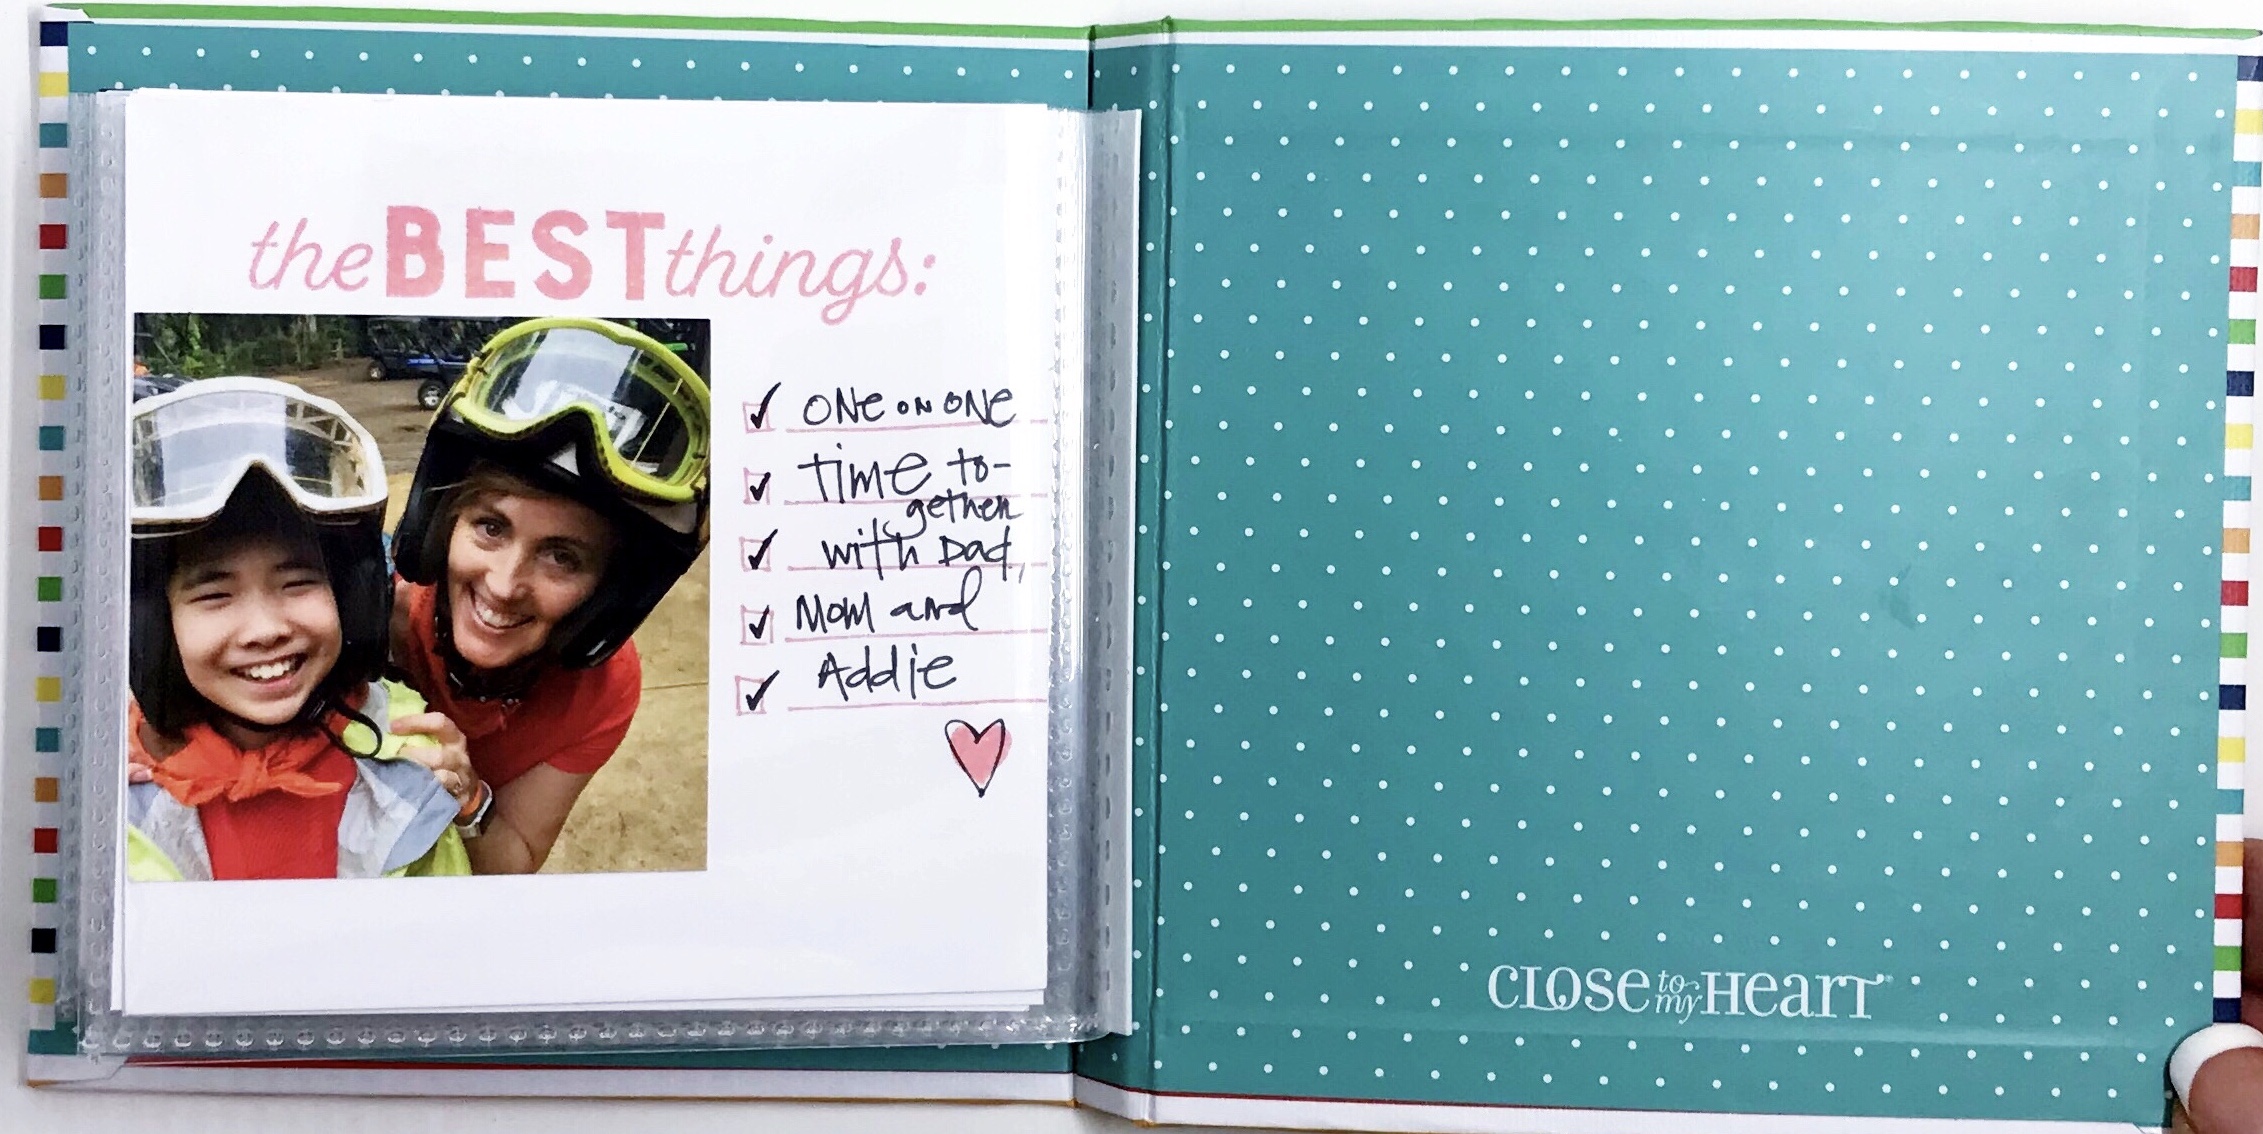
6. To create the colorful look of my album, you'll bring photos into your collages that are all the same color or feature predominately the same color. This is a super FUN way to view your vacation memories and it removes any obligation you feel for putting things in chronological order—which lets be honest, tends to slow us down unnecessarily—at least in a little album like this!
7. A Story Starter album has a title page, 9 inside spreads and a closing page. It is the PERFECT size to document a trip like this in a FUN, fresh way. So, select a photo for your title page and a photo that includes YOU for your closing page. YOU are the storyteller here, so you should be featured on the closing page! By the way, you can click HERE to order your own Story Starter kit.
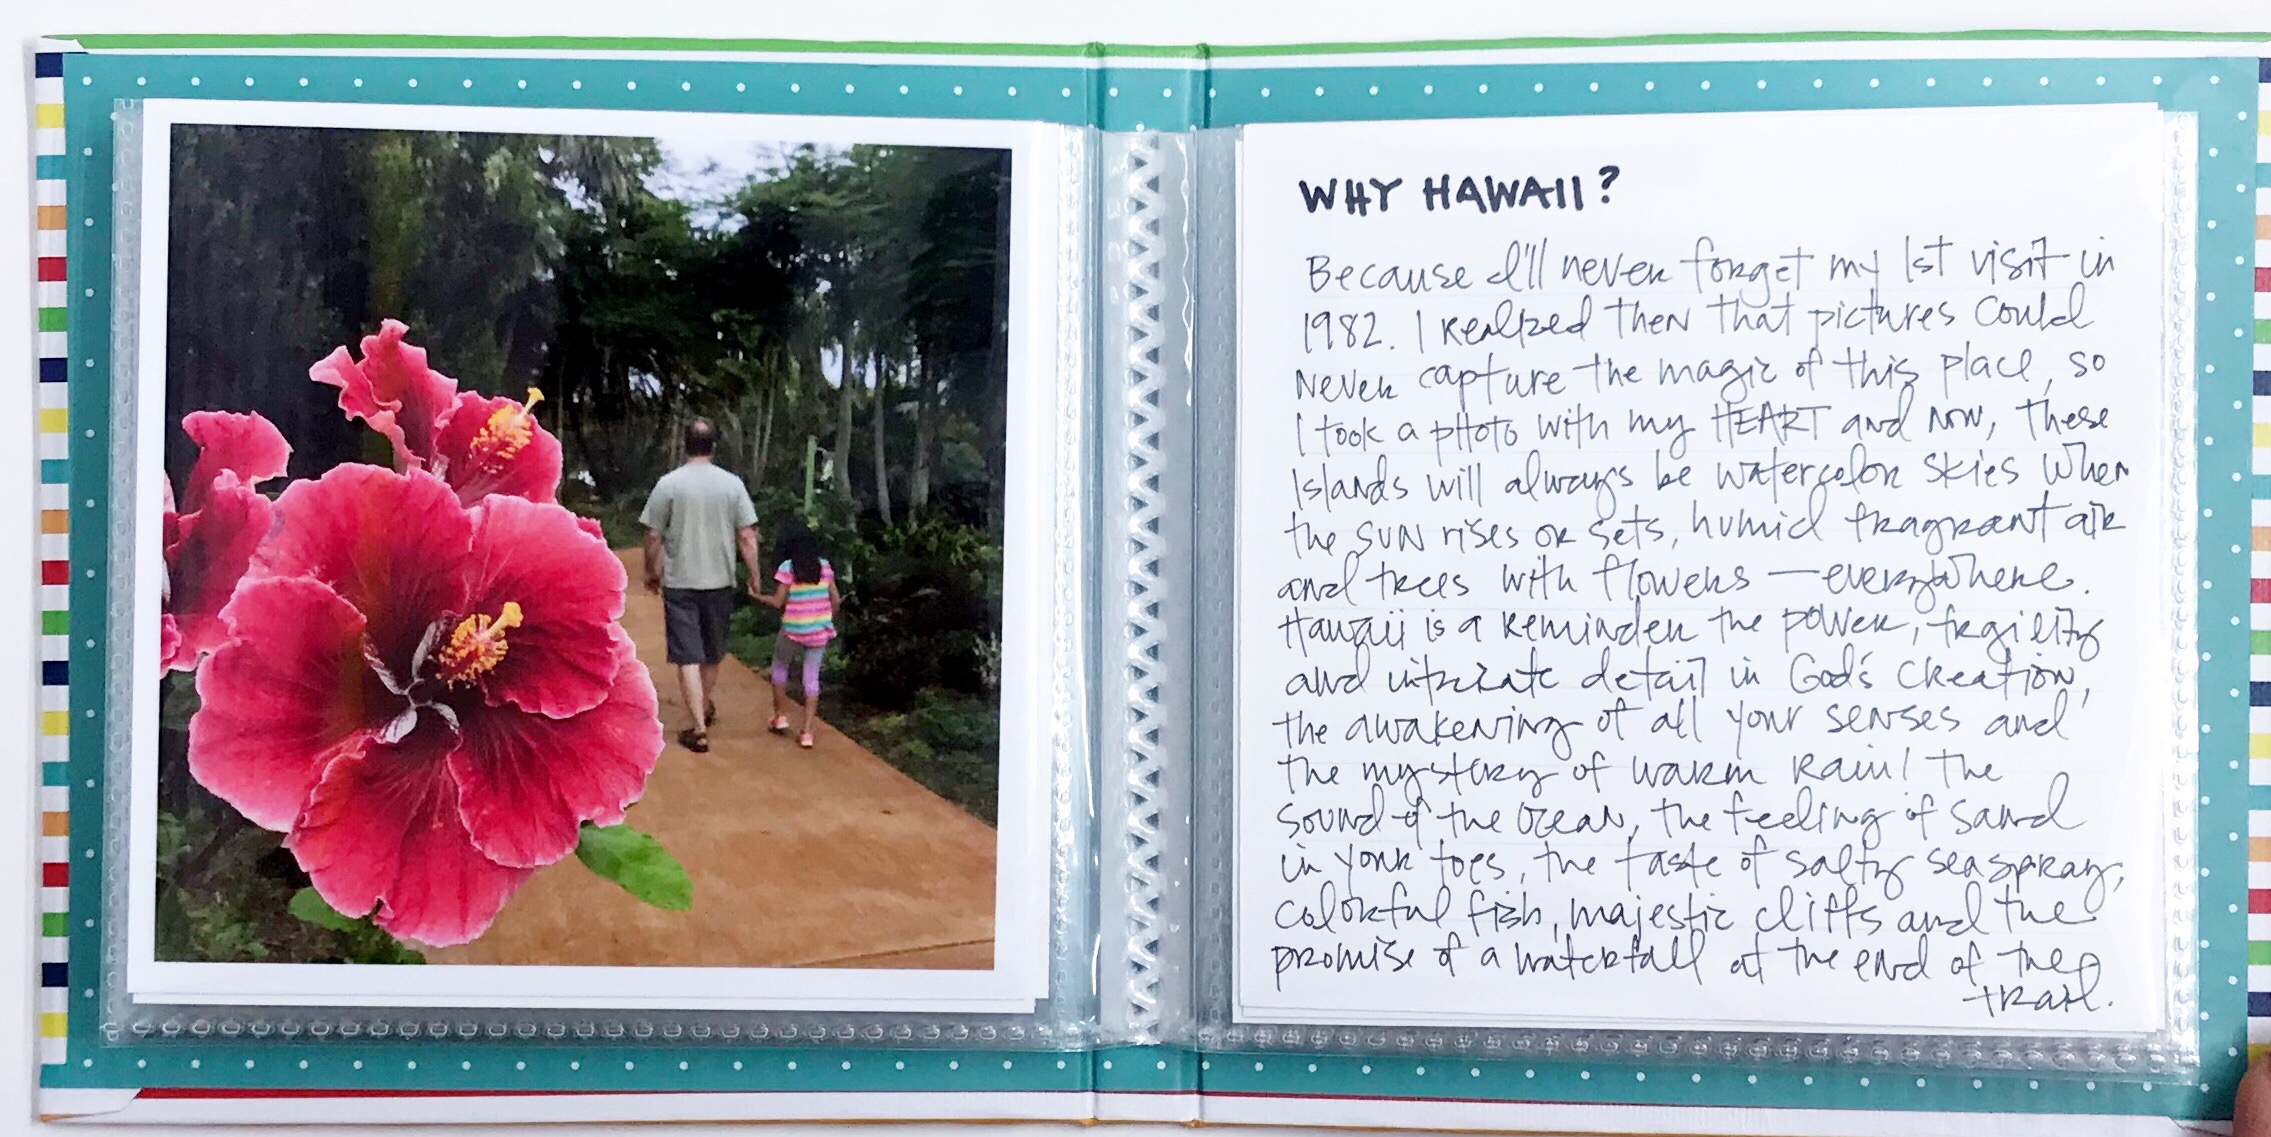
8. The Story Starter creative process teaches you to close your eyes and spend some time with your memories, so that you can include in this album those thoughts and details most authentic to you and your experience. I did this and decided to handwrite these personal thoughts—that take me back to high school—opposite my most favorite photo, right in the center of my little album. I actually LOVE that these little albums have a clear "center" because it seems to beg for something a tad different there.
10. Use the story cards that come in the Story Starter kit to handwrite details opposite each photo.


TIP: I created a "base" for my journaling, by combining three stamps from the sets designed to support Story Starter. Stamps are not required, but they sure are FUN—the two exclusive stamp sets are Quotable Words and Colorful Texture. Which do you think you would use most often?
And that is basically it. EASY. I like to adhere my photos to story cards (the kit comes with 18, so you have plenty) to give them a bit more stability. Slip your collage photos and story cards into the little page protectors and call it a (very productive) day.
Here's what my little album looks like, page by page ...


The slogan that comes to mind for me when I think about these little books is "Scrapbooking should be THIS EASY!" and I really think at least some of the time it can be. I'm determined to help as many busy moms and former scrapbookers discover or rediscover the JOY of putting together SIMPLE scrapbooks. I would be so grateful if you would help me spread the word. If you know someone who could use these ideas, please share this post with them—or share it with your followers on Facebook. Thank YOU!
AND ... please post any questions you have—I will then edit this little tutorial to make sure I've not forgotten important details.